Proxmox
Windows 11 - Quick Setup (unattend-virtio.iso)
This ISO works the same as the one for Hyper-V, but adds the required virtio drivers to work with the virtio SCSI controller in Proxmox. Otherwise it's the same. It'll automate the install of Windows 11 for you. Just add it as an extra CD drive for your VM and boot the Windows ISO.
- Download the unattend-virtio.iso
- Then use the settings below
Settings
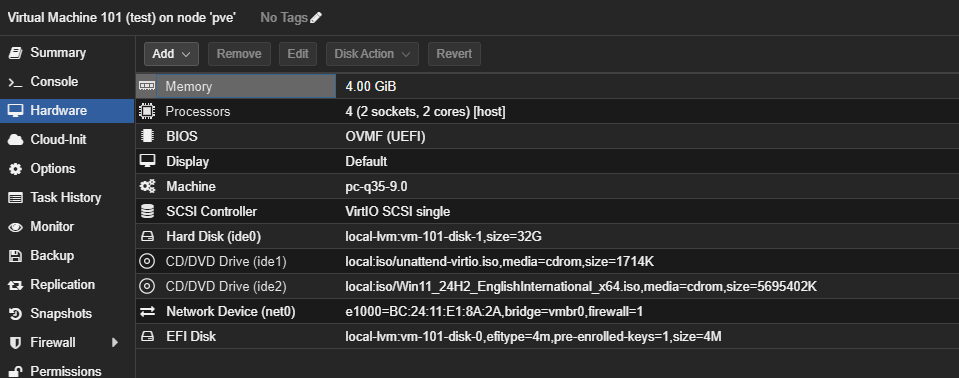
Options

Once Windows is fully installed, you can download and mount the full virtio ISO and install the guest utilities.
Spoofing Make & Model (Bypass VM Detection)
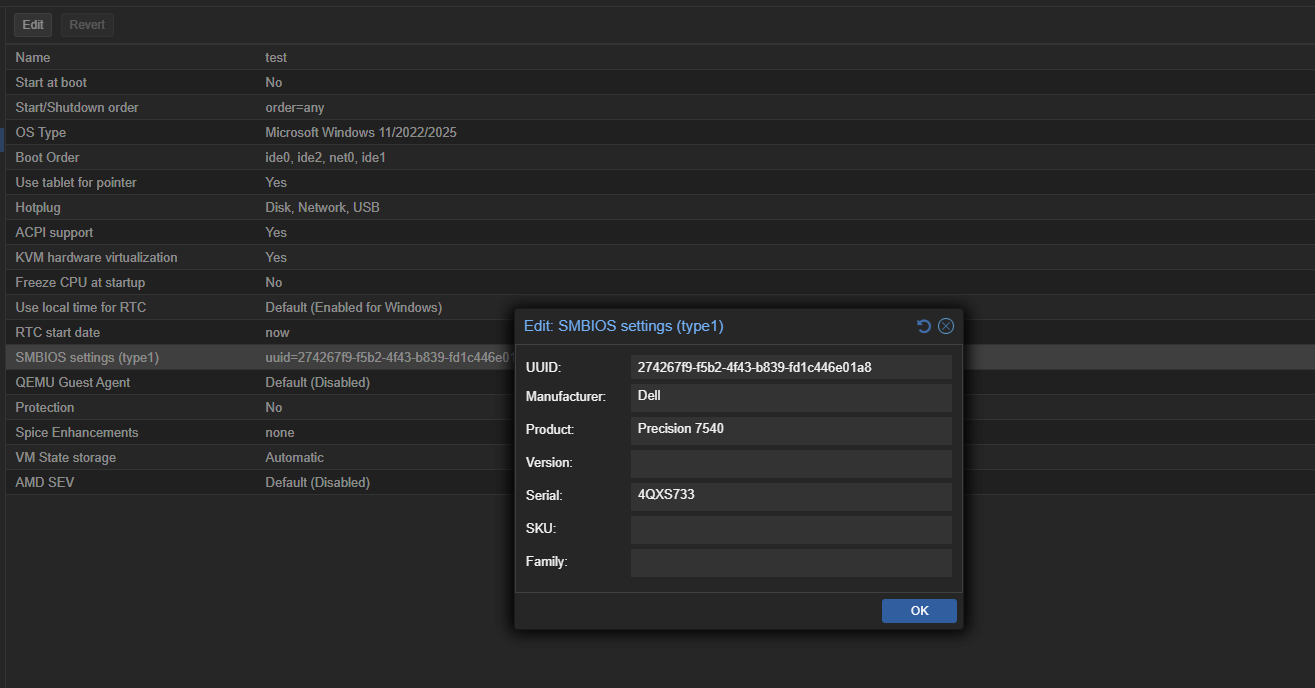
Proxmox can be used to spoof the Make and Model of the machine in the SMBIOS, which is useful for bypassing Virtual Machine detection in some security products. Just set the values under the VM -> Options -> SMBIOS Settings.
An example is shown below:
Running Nested in Hyper-V
To run Proxmox nested in Hyper-V you can just create a new Proxmox VM using the ISO from the Proxmox website. Make sure to give the disk plenty of space (if using .vhdx this is thin-provisioned so don't worry too much about making it too big). You can use either a Gen1 or Gen2 VM but if you pick Gen2, make sure you set the UEFI provider to Open Source Shielded VM.
Important: Before Booting
Before booting the VM you need to enable nested virtualization and MAC address spoofing. You can do this using the following PowerShell commands (run as administrator):
Networking
Proxmox Host VM
Networking should work fine if you are already using a Hyper-V NAT Network. If not, follow those instructions to create a new NAT and assign the proxmox VM a static IP in the range for your NAT.
Proxmox Guest VMs
You can either:
- Easy option: simply assign VMs an address in the Hyper-V NAT range (it will "just work", no tweaks needed to the network bridge).
- Harder setup, useful for longer-term: setup a DHCP server using an Ubuntu LXC container.
Hyper-V
Windows 11 - Quick Setup (unattend.iso)
If you just want to quickly build a Windows 11 VM for testing, and don't want to mess around clicking through the install in Hyper-V or turning off all the crappy default settings in Windows, you can use this magic unattend.iso to automate the install AND bypass the requirement for a TPM / minimum RAM size.
- First download the international English installer from here.
- Then download this small (66kb) unattend.iso which contains the
autounattend.xmlfile generated from here (with a small tweak to the language settings*).
*If you click on that link you can see what settings it's configured with. Basically, I just had to tweak the output of that to change the following section:
Now, just create a new VM in Hyper-V with these settings below. Note that it has two DVD drives. One with the ISO for the Windows installer, and the other for the unattend.iso file:

Now start the VM and it will auto-install for you (and bypass those pesky restrictions!) :)
NOTE: Remember to set the password for the admin and user accounts once you've logged in.